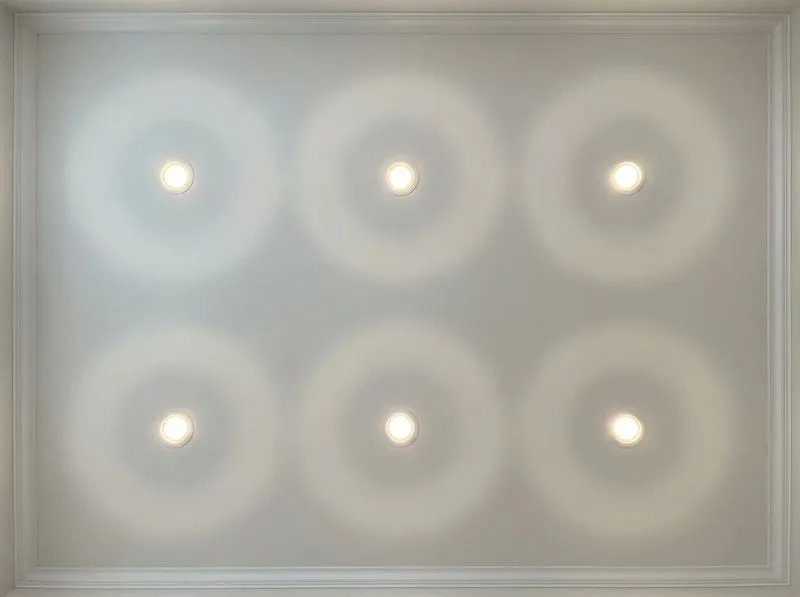
Walk into any recently renovated home in Buckhead, Decatur, or Marietta and you'll notice the same thing: clean ceilings with no dangling fixtures, just even pools of light from recessed cans. Recessed lighting layout makes or breaks the look and function of a room, yet most homeowners leave the placement entirely to guesswork. The result is dark corners, harsh hotspots, or a ceiling that looks like a polka-dot test pattern.
I've installed recessed lighting in hundreds of Atlanta-area homes — from 1950s ranch houses with 8-foot ceilings to new construction in Johns Creek with 12-foot vaults. The spacing math is straightforward once you understand three variables: ceiling height, beam angle, and the job each light needs to do. This guide walks through the formulas, the common mistakes, and room-by-room recommendations so you can plan a layout that actually works before a single hole gets cut.
The Core Formula: Ceiling Height Divided by Two
The most reliable starting point for recessed lighting spacing is simple division. Take your ceiling height in feet and divide by two. That number, in feet, becomes the distance between each light. An 8-foot ceiling gets 4-foot spacing. A 10-foot ceiling gets 5-foot spacing. This baseline keeps light distribution even and prevents the "spotlight effect" where individual pools of light don't overlap.
Wall wash distance — how far the first row of lights sits from the wall — follows a different rule. Place the first light at half the spacing distance from the wall. For 4-foot spacing, the first can sits 2 feet from the wall. This prevents dark edges along the perimeter and makes the room feel larger.
These formulas assume a standard flood beam angle of about 60 degrees. Narrow spot trims (15-25 degrees) need tighter spacing. Wide flood trims (80+ degrees) can stretch out further. Your electrician should factor beam angle into the final plan.
Room-by-Room Recessed Lighting Layout
Kitchen Recessed Lighting
Kitchens demand the most light of any room in the house. The Illuminating Engineering Society recommends 50-75 foot-candles for food prep areas. That translates to roughly 4-6 recessed cans in a standard 10x12 kitchen, with tighter 3-foot spacing over countertops and a wider 4-foot grid for general ambient light in the center.
Pro Tip
Do not place kitchen recessed lights directly above the counter edge — you will cast your own shadow onto the cutting board. Move lights 18-24 inches out from the wall so the beam hits the counter surface. If the kitchen has upper cabinets, place lights 12 inches out from the cabinet face.
Islands and peninsulas need their own dedicated row — usually two to three cans spaced 30-36 inches apart, centered over the island's working edge. These should be on a separate dimmer circuit so you can drop ambient lighting during dinner while keeping the island bright for serving.
Living Room and Great Room
Living rooms don't need the raw lumens of a kitchen. Aim for 20-30 foot-candles. The standard ceiling-height-divided-by-two formula works well here. For a 14x18 living room with 9-foot ceilings, plan on 6-8 cans spaced 4.5 feet apart.
The key to living room layouts is zoning. Group lights over conversation areas, reading nooks, and focal walls (fireplace, media center, art). Leave the center of the room slightly less bright — that natural variation makes the space feel more comfortable than a flat wash of even light. Use separate dimmer switches for each zone.
Bedroom
Bedrooms need soft, warm light. Most Atlanta homeowners are happiest with 4 recessed cans in a standard 12x14 bedroom — one near each corner, pulled 2 feet from the walls. This creates gentle ambient light without the intensity of a kitchen layout. A dimmer is non-negotiable in bedrooms. Drop the output to 20-30% for evening reading and you avoid the "operating room" problem that plagues bedrooms with too-bright overhead light.
Bathroom
Important
Bathroom recessed lighting must meet code requirements for wet locations. Every can placed in a shower or tub surround needs a wet-rated IC (insulation contact) housing and a sealed trim. Standard recessed housings are only rated for damp locations — the ceiling above a toilet or vanity area qualifies, but directly above the showerhead does not.
A typical master bath uses 3-4 recessed cans: two flanking the vanity mirror (not centered above it, which creates under-eye shadows), one over the toilet area, and one in the shower. The vanity lights should sit 18 inches out from the mirror face.
Hallways and Entryways
Narrow spaces like hallways call for a single row of recessed lights down the center. Space them 4-6 feet apart depending on ceiling height. The entryway or foyer often benefits from a slightly tighter cluster — three cans in a triangle pattern for a standard 6x6 foyer — to create a welcoming brightness when the front door opens.
Choosing the Right Housing and Trim
The housing (the metal box above the ceiling) and the trim (the visible part you see from below) both affect your layout. Here's what matters for planning purposes:
- IC-rated vs. non-IC: If your ceiling has blown-in insulation above it — which is most Atlanta homes built after 1980 — you need IC-rated housings. Non-IC housings require 3 inches of clearance from insulation, which almost never exists in practice.
- New construction vs. remodel: New construction housings attach to ceiling joists before drywall goes up. Remodel housings clip to the finished drywall from below, meaning no attic access needed. For existing homes, remodel housings are the standard choice.
- 4-inch vs. 6-inch: Six-inch cans remain the most popular for general lighting. Four-inch cans work well for accent lighting, task lighting over counters, and smaller rooms where a 6-inch trim would look oversized.
- Baffle vs. reflector trim: Baffle trims (ribbed interior) reduce glare and are the best all-around choice for living spaces. Reflector trims (smooth, mirrored interior) maximize light output and work well in kitchens and utility areas.
Free Download: Seasonal Electrical Maintenance Checklist
Keep your home's electrical system safe year-round with our printable seasonal checklist — built by a master electrician.
Get the Free ChecklistLED Color Temperature for Atlanta Homes
Color temperature — measured in Kelvin — changes the entire feel of a room. Most Atlanta homeowners installing recessed lighting today choose between 2700K (warm white) and 3000K (soft white). The difference is subtle but real. 2700K has a slightly amber tone similar to incandescent bulbs. 3000K is a touch crisper and brighter, popular in kitchens and bathrooms.
Stay consistent throughout connected rooms. A hallway at 3000K opening into a living room at 2700K creates a noticeable color shift that looks unintentional. If you're unsure, 2700K is the safer choice — it flatters skin tones, makes wood floors glow, and works in every room from bedroom to dining room.
Avoid 4000K and 5000K for residential spaces. Those higher temperatures look blue-white and institutional. They have their place in commercial LED retrofits and garages, but they make a living room feel like a dentist's office.
Common Layout Mistakes to Avoid
- Centering a single light in the room: One recessed can in the middle of a 12x14 room creates a single cone of light surrounded by shadows. If you only have budget for one light, a flush-mount fixture covers more area than a recessed can.
- Ignoring furniture placement: A recessed light directly above where the TV will hang creates glare on the screen. Map your furniture layout before finalizing light positions.
- Skipping dimmers: Recessed lights without dimmers only have one mode — full blast. Every recessed lighting circuit should connect to a compatible LED dimmer. This is also where dedicated circuits come into play, keeping lighting loads separate from outlets.
- Using the wrong trim for the location: Eyeball trims (adjustable direction) in a shower, or standard trims in an insulated ceiling, create code violations and safety hazards.
- Overcrowding the ceiling: More lights doesn't always mean better light. Stick to the spacing formula and increase brightness per fixture (higher lumen count) instead of adding more holes.
What About Smart Recessed Lighting?
Smart LED recessed trims from brands like Halo, Lutron, and Philips Hue let you adjust color temperature and brightness from your phone or voice assistant. They're a solid upgrade, especially in living rooms and bedrooms where you want scene control — "movie mode," "dinner mode," "reading mode" — without walking to the switch.
The layout principles stay the same whether you use smart or standard fixtures. What changes is the switching. Smart recessed lights still need a constant power supply, so your wall switch must remain on at all times. Many homeowners pair smart trims with a smart switch or keypad that communicates wirelessly with the fixtures instead of cutting power.
If you're planning a broader home electrical upgrade — EV charger, panel upgrade, whole-home surge protection — bundling recessed lighting installation into the same project saves money on labor and minimizes disruption.
When to Call a Licensed Electrician
Recessed lighting installation involves cutting holes in your ceiling, routing new wiring through ceiling cavities, and connecting to your home's electrical system. In Georgia, electrical work that modifies branch circuits requires a licensed electrician and an inspection by the local authority having jurisdiction. Fulton County, DeKalb County, and Cobb County all enforce this.
Beyond code requirements, there's a practical reason to hire a pro: ceiling joist location. The spacing formula might call for a light at 4 feet from the wall, but a ceiling joist runs right through that spot. An experienced electrician uses a stud finder and, when necessary, adjusts the layout by a few inches to avoid joists while maintaining even light distribution. That field judgment is the difference between a layout that looks professional and one that looks random.
At JD Works Electrical, we handle everything from initial layout planning to final dimmer programming. We'll walk your rooms with you, discuss how you use each space, and map a recessed lighting plan that matches your lifestyle — not just a textbook formula. Check out our full lighting installation services for details.
Frequently Asked Questions
A reliable starting formula is to divide the ceiling height in half. For an 8-foot ceiling, space recessed lights roughly 4 feet apart. Adjust based on beam angle and the specific room function — task areas like kitchen counters benefit from tighter 3-foot spacing.
The count depends on room size, ceiling height, and purpose. A 10x12 kitchen typically needs 4 to 6 cans. A 14x18 living room often uses 6 to 8. Your electrician should calculate total lumens needed based on room square footage and then divide by the output of each fixture.
Yes. Retrofit LED recessed lighting kits fit into existing ceiling cutouts or new holes with minimal disruption. A licensed electrician can fish wires through the ceiling cavity and install new-construction or remodel-style housings in a single day for most rooms.
Ready to Plan Your Recessed Lighting Layout?
JD Works Electrical designs and installs recessed lighting for homes across metro Atlanta. Let's walk your space and build a lighting plan that fits your rooms and your budget.
Schedule a Free Lighting Consultation